Creating your first project
In this tutorial, we’ll cover how to build your first project in SilverStripe. The SilverStripe installer ships with its own default theme -- Simple, but it's more likely you’ll want to override this to use your own custom design.
Themes versus projects
In a conventional SilverStripe project, the code and business logic (backend) of a website is kept separate from the UI and design elements (frontend). More specifically, PHP classes and configuration files are kept in the project directory, while templates are kept in the theme directory.
In a default installation of SilverStripe, your project directory is called mysite/, and lives in the project root. Your theme directory, however, will be located one level deeper, under the themes/ folder. Because the code layer is detached from the UI, a given project can have multiple themes.
Building the theme structure
We can create a theme by adding a new folder under themes/. The folder name is arbitrary, but must be comprised of only alphanumeric characters, dashes, or underscores.
Underneath the theme folder, we can create some new folders for our templates and assets.
themes/
  my-theme/
    css/
    images/
    javascript/
    templates/
      Includes/
      Layout/
Most of these folders are self-descriptive, but note that the only folders with compulsory names are templates/, and its Includes/ and Layout/ subfolders.
What about /public/?
You might have noticed that many of the above folders should be web-accessible resources. In the themes/ directory, they won't be. This would be fine if we were distributing this theme for others to install on their projects (for instance, a blog theme) because, on installation, a special composer plugin will expose all of the web accessible resources to the public/ directory through symlinking. Most of the time, however, your theme is a one-off custom design for your project and won't be distributed. In this case, we should move all those directories to public/. Let's do that.
Here's our new structure:
public/
    css/
    images/
    javascript/
themes/
  my-theme/
    templates/
      Includes/
      Layout/
Using the project as a theme
Now that we've migrated all of the web-accessible resources out of the themes/ directory and into public/, you might notice that the theme directory is looking pretty sparse. It's really just a holder for templates.
We could leave it as is, but since we only have one theme, keeping all of the templates in a separate place probably adds more organisational overhead than it's worth. Let's move the entire templates/ directory into our project directory, mysite/.
public/
    css/
    images/
    javascript/
mysite/
  _config/
  code/
  templates/
    Includes/
    Layout/
You can now delete the themes/ directory.
This is entirely a preferential change. You might want to keep the templates in themes/, and that's fine. Just be aware that subsequent tutorials will assume you have your templates in your project directory.
Keeping themes/ directory
If you want to continue using the themes directory, you might need to make a few changes to your project to expose those files to the web. For instance, you will need to add this to your root composer.json for each folder with public files.
{
    "extra": {
        "expose": [
            "themes/my-theme/css"
        ]
    }
}
Then if you do a composer update, or run composer vendor-expose, you'll see a folder created at
public/resources/themes/my-theme/css which will allow your css files (and only those css files) from
your theme to be available to the web.
Creating your first template
Next we’ll create the most fundamental component of a theme -- a template. In SilverStripe, templates are not HTML documents, but rather PHP code that is compiled from SilverStripe’s own template syntax behind the scenes. In alignment with that key distinction, it is imperative that template files use the .ss extension.
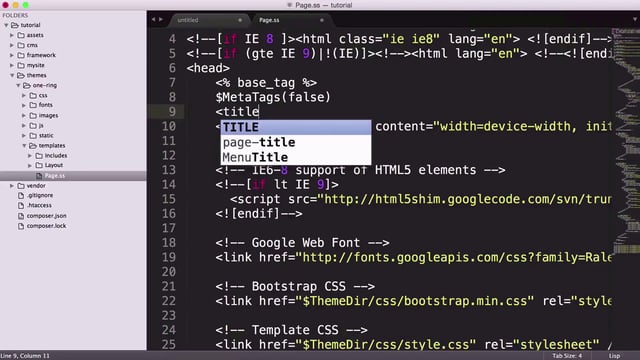
In your templates/ directory, create a file called Page.ss. Inside that file, create a basic HTML document.
<html>
  <body>
    <h1>Hello, world</h1>
  </body>
</html>
Why Page.ss? A default installation of SilverStripe ships with a page type called Page. Typically, this page type is used to display the most basic form of content for a project. A common use case is for the “About Us” page, or even something more plain, like "Terms and Conditions."
Activating the theme
To activate the theme, we’ll have to dig into the project directory. Open the file theme.yml in the mysite/_config directory. Under the heading SilverStripe\View\SSViewer, take note of the setting for themes. All we need to do here is to supply the variable $public as a theme, so that web accessible resources don't 404 in certain cases.
SilverStripe\View\SSViewer:
  themes:
    - '$public'
    - '$default'
If you have chosen to keep your themes/ directory, you will have to supply the theme name in this list.
SilverStripe\View\SSViewer:
  themes:
    - 'my-theme'
    - '$public'
    - '$default'
In this configuration file, the theme my-theme is given the highest priority. If a template can't be found in that theme, SilverStipe will continue working down the list, trying each theme until it finds a match. As a fallback, you'll want to have $default as the last entry in your list to ensure the base templates get loaded.
Don't forget to ?flush
These files are written in YAML, which is a markup language, similar to JSON or XML, that is very well-documented. Configuration is a very rich topic in SilverStripe that we’ll cover in later tutorials, but for now, the only important bit you need to know is that any changes you make to these files requires a cache refresh in order to be used. To clear the cache, simply access any page on your site and append ?flush to the URL, e.g. http://{your localhost}/tutorial/public/?flush
Once the page is loaded, you should see your “Hello, world” page template.
Renaming the project
This is another entirely optional enhancement that will vary with developer preference. The default project, "mysite" is a bit tongue-in-cheek, and has overtones of a sandbox project that will never make it to production. Further, as it begins with the letter "m", it gets buried in an awkward place in the directory list. It's fairly common for developers to change the project name to something like "app", which is consistent with other frameworks, and has the benefit of appearing at the top of your directory list, which will save you precious seconds in your code editor.
To rename the project, first, change the name of the directory itself. Then, for consistency, change _config/mysite.yml to _config/app.yml. Lastly, open that file, and register the project as 'app'.
---
Name: myproject
---
SilverStripe\Core\Manifest\ModuleManifest:
  project: app
Again, this change is entirely optional. If you choose not to do it, just be aware that future tutorials will assume your project is named app/.
Run ?flush again to update the config.
Final polish
As we've now renamed the project from mysite/ to app/ to make the project more adherent to common standards, it follows that we should also change the code/ folder to src/, which is much more common, and consistent with most SilverStripe modules, both core and community-supported. In future releases of SilverStripe, expect the code/ folder to be dropped in favour of src/. Right now, it's still there for legacy reasons.
app/
  _config/
  src/
  templates/
Lastly, let's add an autoloading specification. SilverStripe has its own autoloader, so this step is purely optional, but it's a good idea to embrace standards whenever possible. Using a standard PSR-4 autoloader declaration will help make your project more interpolable and upgrade resistant. The intricacies of PSR-4 autoloading are out of scope for this tutorial, but the documentation is very accessible and easy to understand. Basically, PSR-4 establishes a contract between the namespace of a class and its location in the filesystem.
To specify a PSR-4 autoloading declaration, we'll need to put a composer.json file in our project. This is also generally a good idea, in the spirit of making our code as modular as possible.
app/composer.json
{
    "name": "silverstripe/lessons",
    "description": "The silverstripe.org lessons example code",
    "license": "BSD-3-Clause",
    "authors": [
        {
            "name": "Uncle Cheese",
            "email": "aaron@silverstripe.com"
        }
    ],
    "require": {
        "silverstripe/recipe-cms": "^1.1"
    },
    "autoload": {
        "psr-4": {
            "SilverStripe\\Lessons\\": "src/"
        }
    }
}
Most of this is populated with pretty generic information, but the important section is the "autoload": node. It maps the name space SilverStripe\Lessons to the directory src/. Should we ever need another level of namespacing, e.g. SilverStripe\Lessons\Controllers, we would put those class definitions in src/Controllers. PSR-4 is just a simple method to make autoloading more predictable and deterministic.
That's it
We've now created our first project. That puts us out on our own, and ready to start building stuff.


